Valentine’s Mystery Quilt-a-Long #3

Welcome back for the third and final week of our Valentine’s Mystery Quilt-a-long. Check out Week 1 and Week 2 if you have missed them. At this point, the mystery is over and you will be able to finish your lovely Valentine’s Day table topper. Let us show you how!
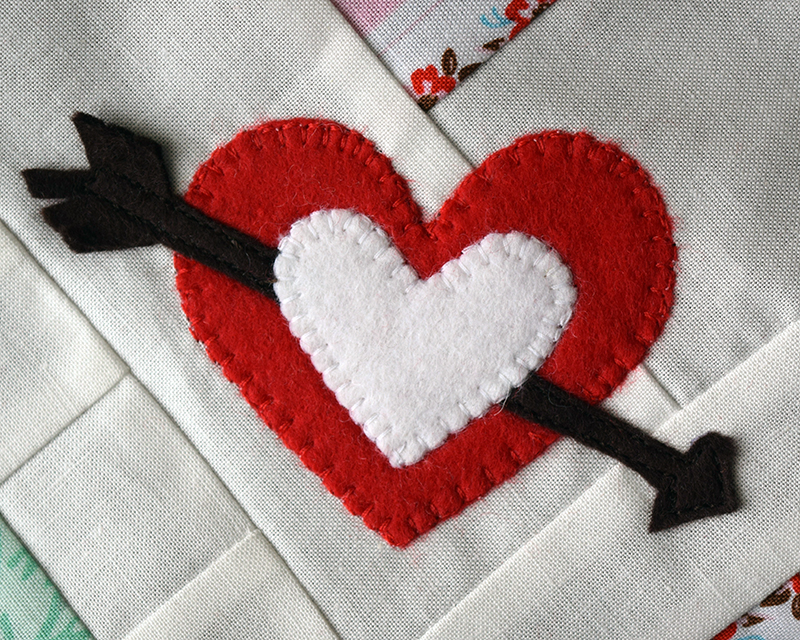
We added embellishments cut from our favorite felt in four colors: red, pink, white, and espresso brown.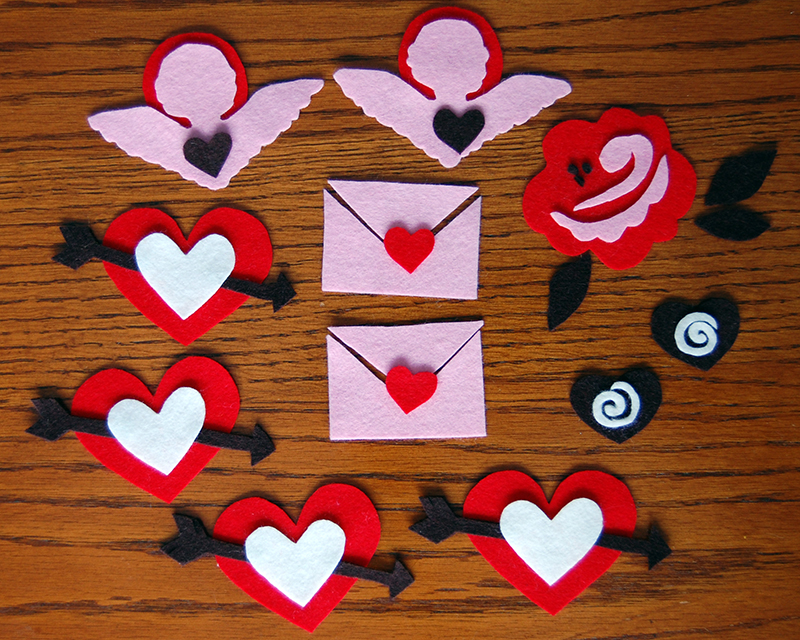 We designed cherubs, love letters, hearts and arrows, chocolate candies, and a rose for the center.
  We arranged the shapes with the hearts in the corners, the rose in the center, and the cherubs and love letters with chocolate on opposite sides. You can do the same, or mix it up!
  The great things about this felt are that it can be sewn on quickly by machine, it holds its shape well, and it’s machine washable! We chose different combinations of blanket, zig zag, and regular stitch for each motif, as you can see in the photos below.
 The pink shapes really needed a contrasting thread to make them show up on the white background.

 Once the embellishments are sewn in place, you are ready to prep for quilting. You will need at least 1 1/4 yards of backing, depending on how you are quilting it. We used 1 1/2 yards since we knew we were putting it on our long-arm quilting machine.
We wanted to do freeform hearts and loops, but the first couple of tries were a huge failure. Keeping the tension right on our big machine is sometimes a real pain. After rethreading, readjusting, and picking out the quilting twice, we finally got this puppy quilted! In the end, it did not disappoint. When the quilting is done and you have everything trimmed, it’s time to make your binding. You will need 1/3 yard of fabric for binding, cut into four 2.5″ strips. You will also need 4 yards of coordinating 5/8″ jumbo ric rac. Sew the binding onto the back of the quilt.
 From the top of the quilt, fold the binding around to the front of the quilt. Before sewing the binding down, insert the ric rac half under where the binding will finish. You can stitch the ric rac in place before folding the binding around if you are more comfortable with that.
  Fold the binding over the ric rac and sew in place. If you have a walking foot, it helps a lot with this step.
  When you get to the mitred corners, cut the ric rac off and overlap the ends as shown below.


 Complete the binding by overlapping the ric rac when you get to your starting point. Your Valentine’s Day table topper is finished!

 We are so glad you could quilt along with us! We hope you have enjoyed your time here. If you have completed this project, we would love to see your pictures! We have a few Milk, Sugar, and Flower fat quarter bundles and some of our Candy Shoppe Quilt patterns that we would love to give away to those of you who have finished. You have until January 31, 2016, to submit your photos to us. There are three ways to enter:
- Instagram: Tag us in your photo @theclothparcel AND use #valentinesmysteryqal
- Facebook: Post your photo on our Facebook page or in our Facebook group, Quilting with The Cloth Parcel
- Email: Send your photo to audrey@theclothparcel.com with subject line “Valentine’s Mystery QAL”
Can’t wait to see your creations!


Thank you for this great project! It’s amazing how great the appliques and ric rac make the finished quilt look
Thank you, Barb! We couldn’t agree more.
Oh I just love the ric rac sewn in for a scalloped edge. Actually I love everything about this. Thanks for sharing on the #HomeMattersParty I hope you will join us again next week.
Thank you for this beautiful project ….I just learned I will be a great Grandmother in September ….this will be a beautiful baby quilt .
Oh, yes it would be a lovely baby quilt!