Make This: Scrappy Binding Tutorial

Have you ever wondered what to do with the scrap pieces of binding that are leftover once your quilt is bound? Sometimes, they can be quite long, and it seems like such a waste to throw a perfectly ironed bit of binding away. You can always use small pieces for small projects, like our free baby bib pattern, or our Essential Diaper Clutch. 
But what about a bigger project? We love to save all of our scraps and use them on quilts, pillows, and table runners. We use these cute girl spools to store our binding while we’re saving up.
This one was made by our Creative Team member, Cami. Isn’t she cute?
Once you have enough binding scraps saved, pull them out and audition them around whatever you are binding. This will give you an idea of how much you will need and what colors will work. Make sure to have at least 12″ of extra binding. Today, we are binding a test block that we made for an upcoming quilt pattern, using some of our scrap fabrics and a floral fabric in the middle designed by Audrey. We then used it for machine quilting practice at a class we took from Christa Watson of Christa Quilts.
Once you’ve picked your binding, trim all the ends at a 45 degree angle in the same direction.

Take them over to your sewing machine and join the binding just how you would a regular binding.
Sew a 1/4″ seam with the 45 degree cut edges laying perpendicular to each other.
Iron all the seams with the seam to one side. This is how it should look.
Now, to machine bind, you will start sewing the binding on the back of the quilt, instead of the front. Align raw edges of the binding with the raw edges of the quilt.
Sew with a 1/4″ seam. When you get to a corner, stop 1/4″ from the edge.

Turn the quilt, and flip the binding up away from the quilt.
Then, fold the binding back down to line up with the next side of the quilt, leaving that little diagonal fold in there. This is important to have enough fabric for the mitred corner on the front. Starting from the corner, continue sewing around the quilt as before.
Once you get near where you started, stop and back stitch, leaving a gap of a few inches. This is harder on mini quilts, because they are so small. If you are binding a larger quilt, leave yourself a 12″ gap.

Lay the binding edges flat, one on top of the other. Pin in the middle of the gap and make sure everything is flat. Then, take a marking tool and mark where you pinned on both bindings. 

Trim each binding 1/4″ away from the marks you made. 
Now the binding ends are the perfect length for your quilt! Join them along the 45 degree angles, as before.
This is what your quilt should look like with the binding sewn all the way around the back of the quilt, with folded corners. The hard part is done!
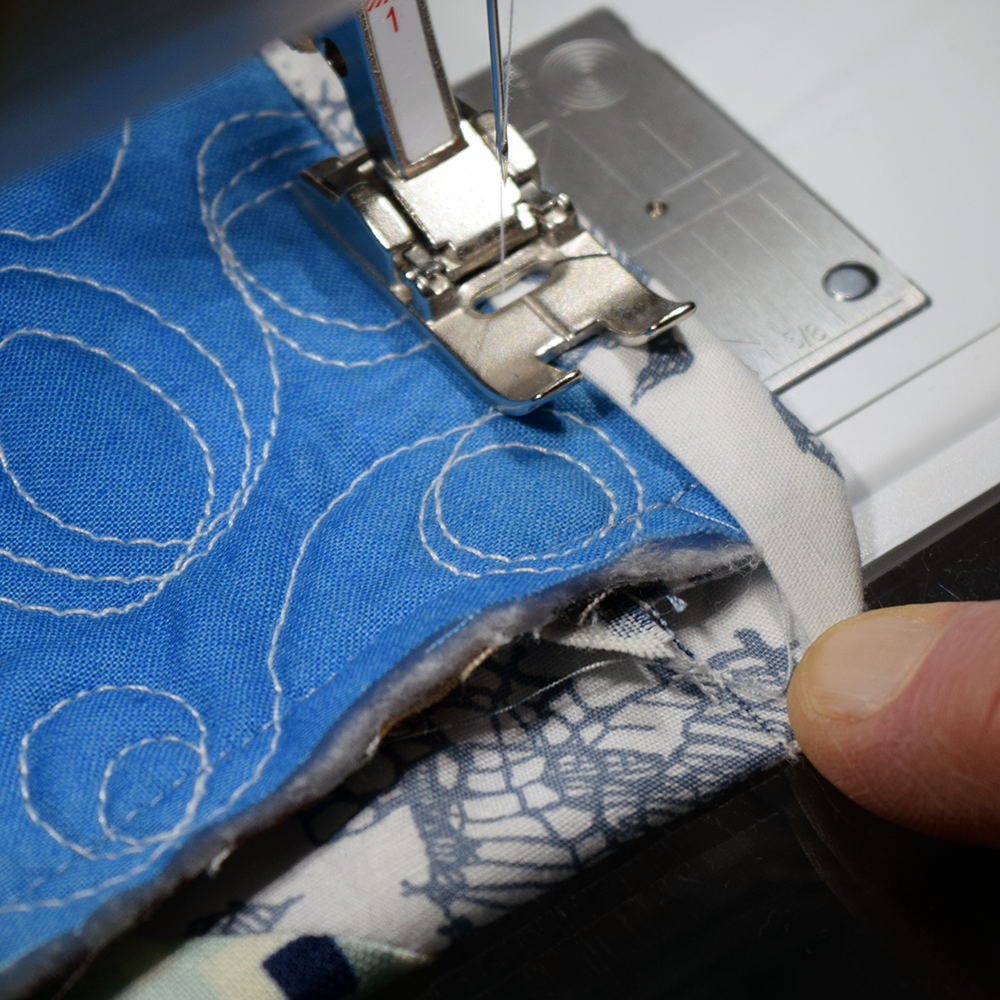
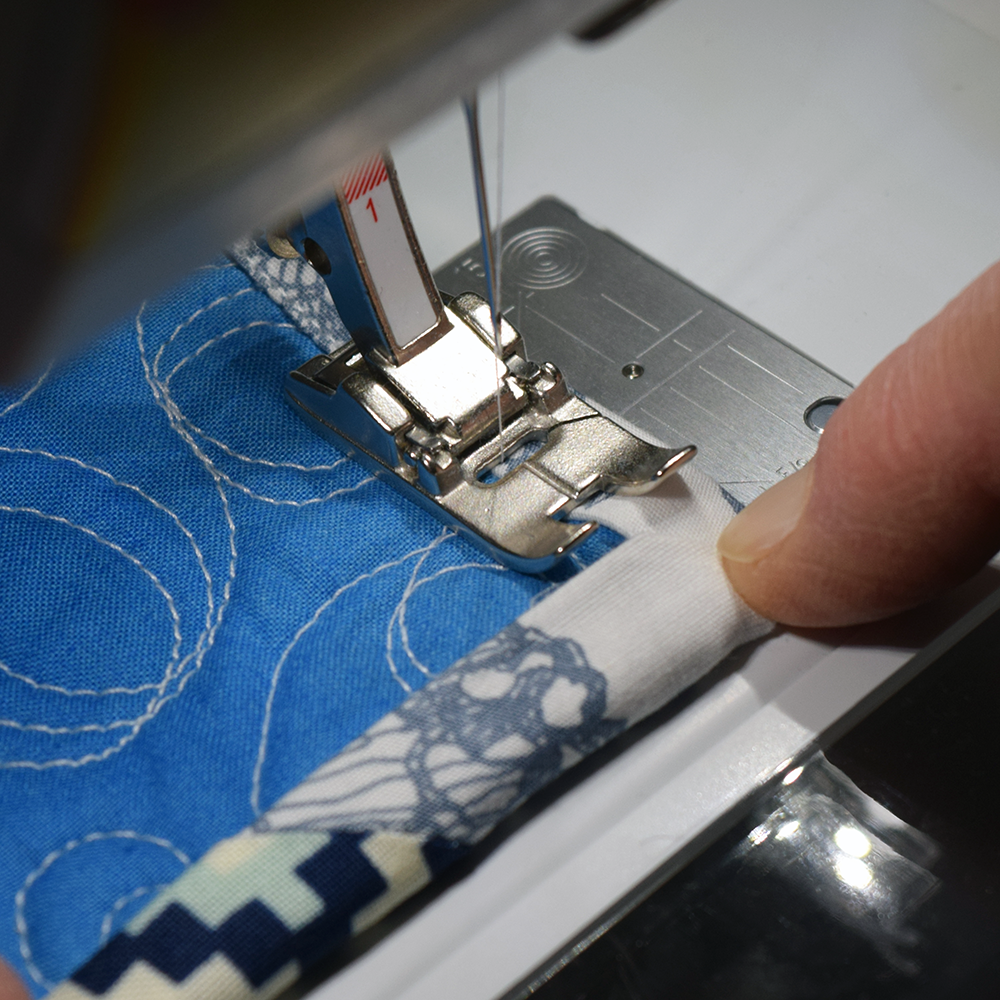
All that is left is to fold the binding around to the front and stitch it down. We find that a walking foot can help on this step if you are having trouble. We’ve also heard that an edge stitch foot is great for this step, but we haven’t had a chance to test it out ourselves. Stitch very closely to the edge of the binding.
When you get to a corner, fold the corner straight.
Then fold it back up to line up with the next side.
Sew to the corner. Once you get there, drop the needle and turn the quilt.

Continue all the way around the quilt, and you’re done! This method is immensely faster than hand binding, and much more durable for quilts that will get heavy use.


Today’s post is part of the “Save Our Scraps!” edition of the Sew Much Fun Blog Hop. Visit these other great bloggers for more scrappy ideas:
- Jen @ Faith and Fabric
- Stephanie @ Swoodson Says
- Vicky @ Vicky Myers Creations
- Cynthia @ Quilting is More Fun than Housework
- Amista @ Hilltop Custom Designs
- Ula @ Lulu & Celeste
- Chris @ made by ChrissieD
- Amanda @ Fabric Engineer
Thanks for joining us. We hope you’ll stick around and see what we have going on. You can follow our blog through email by entering your email address in the box on the upper left side of this page, or you can subscribe to our newsletter just under our profile picture. Also, check out our original patterns, fabric and other goodies for sale, and our quilting, sewing, and crafting tutorials. Hope to see you around!


I really like your scrappy binding – and, just as much, your tutorial on machine stitching the binding! It’s a technique I’m still learning for sure.
Thank you for the tips on saving left-over scraps from binding to use for other projects. Thats a great idea!